Hey Sweeties,
Something a bit different for you this fine Sunday, but hopefully a welcome one. As you, me, my rabbit Wilfred and the entire western world know, we have gone nuts for avocados in recent times and as we devour these peculiar looking, soapy feeling, delicious tasting food stuffs, most people remove the pit and lob it in the bin; not me. For the past few months I have been trying to grow an avocado and while I am still yet to produce an actual avocado (apologies for the early spoiler), I feel it’s only time before I do. Until then however, I thought I would share with you the growing process so far and should you wish to also try and grow an Avocado or two, you can see how it’s done.
Disclaimer: I am in no way an expert on avocado growing, my advise should be perceived as a guide only.
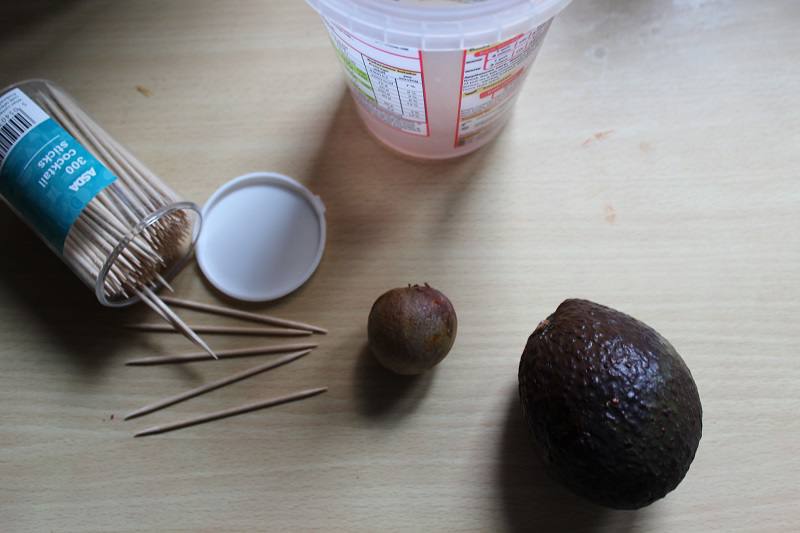
So, to begin you need to have an avocado with the pit removed; cocktail sticks; a tall pot or cup (I have been using jam jars); and patience. It’s also very easy to get carried away and save all future avocado pits with a view of growing trees from them, hence why in the photos you will soon see, I have several pits on the go in various stages of growing.
So.
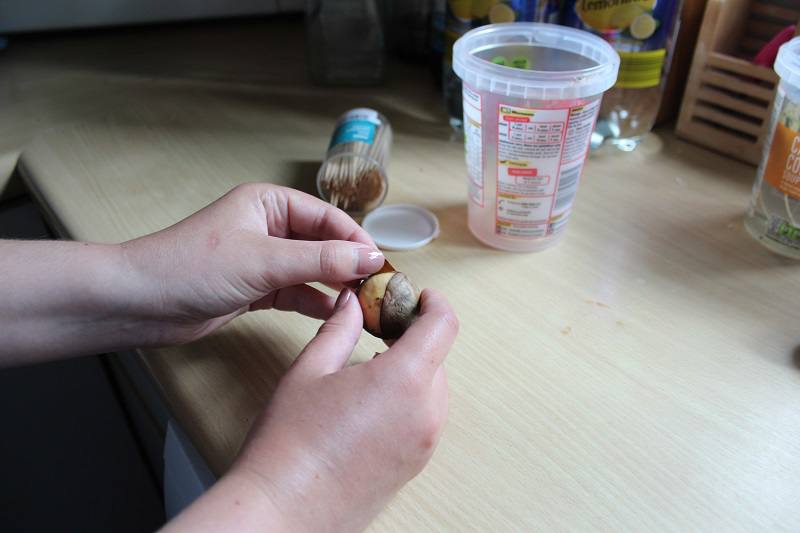
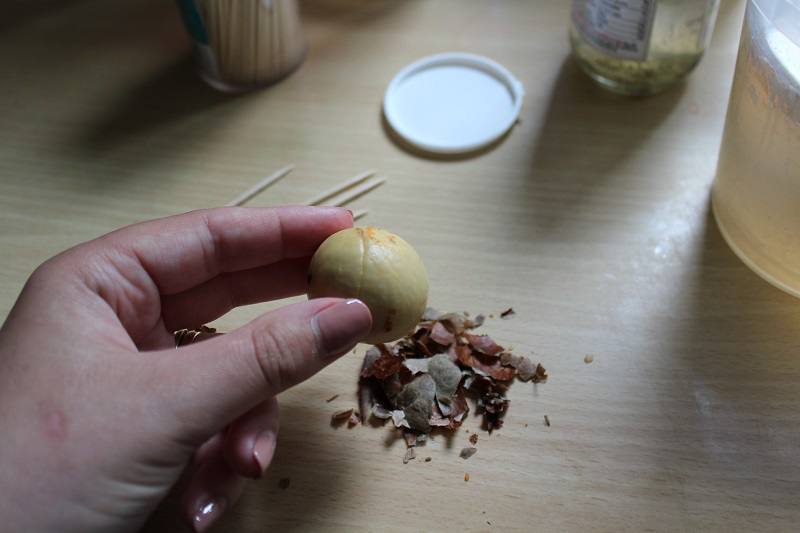
With the avocado pit removed, you need to clean it and peel off the outer skin. I won’t lie, this can be really fiddly and while some pits are easy to peel, others take ages and in these situations, I often use a knife tip to help pick off the skin (please seek the help of an adult in the event you’re a child reading this). Sometimes leaving the pit to dry out a little can help with the peeling process to.
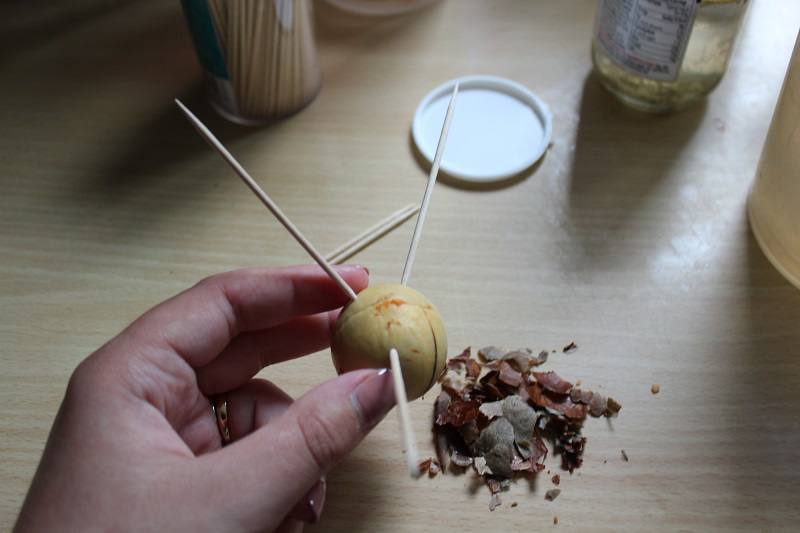
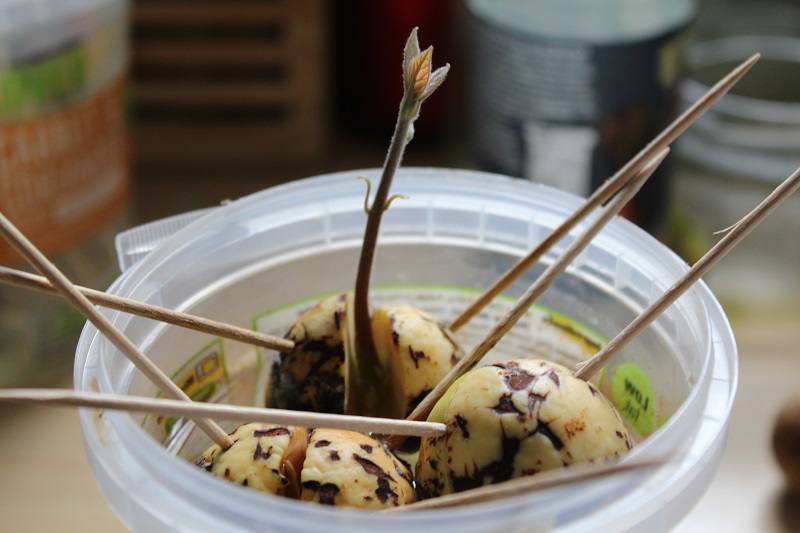
With your pit(s) peeled, you need to get three cocktail sticks and pin them into the top part of the pit in like, a triangular formation so the pit will be able to balance in a cup. It’s also really important here to make sure you get the pit the right way around so that you root the correct part in the cup, and also to ensure you don’t pin the sticks along what looks to be cracks; once the pit grows, it’ll split and it’ll just help things if it can do that freely.
Then, with your pit(s) peeled and the cocktail sticks in place, you simply need to balance it within the top of a pot or cup –the reason why I said earlier it ideally needs to be tall, is because once the roots of the avocado tree grow, again it just helps if it has room and the pictures below should help you understand why more visually.
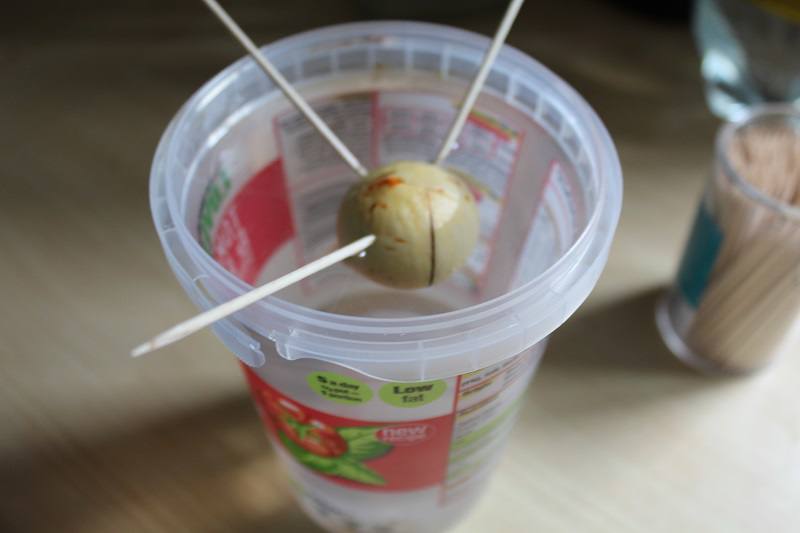
The best place to position your cup(s) with the pits balanced inside is along a windowsill so it can get lots of light. You also need to fill your cup with water until only the top of the pit is exposed; I would also recommend changing the water weekly to ensure it’s clean, but do check the pit every couple of days and top up the water as necessary.
After a couple of weeks, hopefully you should start to see the pit split and the beginnings of roots and the stalk of the avocado tree appear, but be warned, this can be an extremely timely process and if you don’t see anything after a couple of weeks, just be patient.
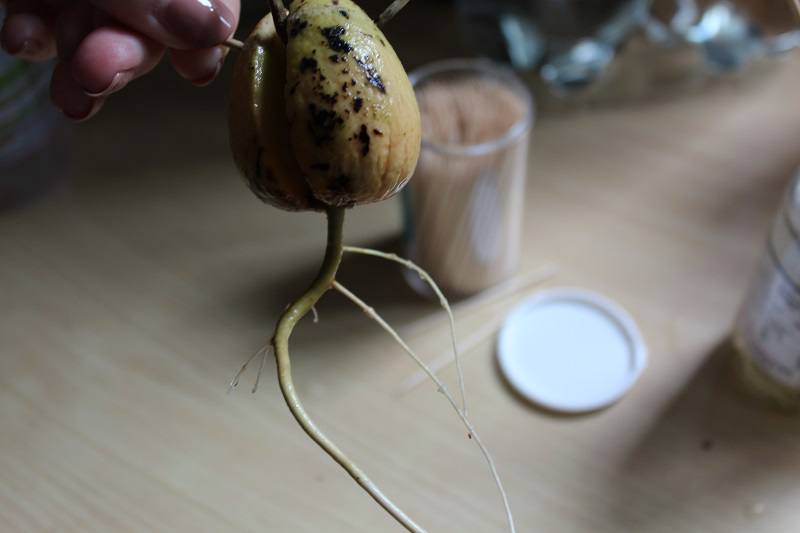
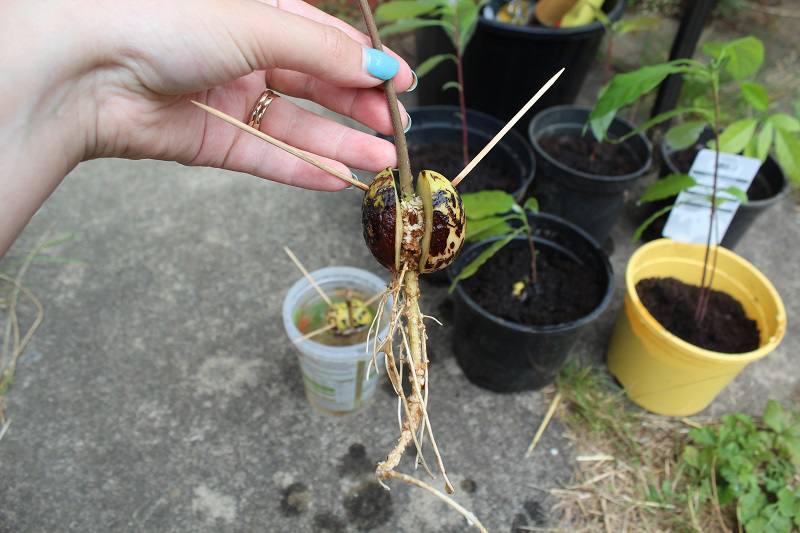
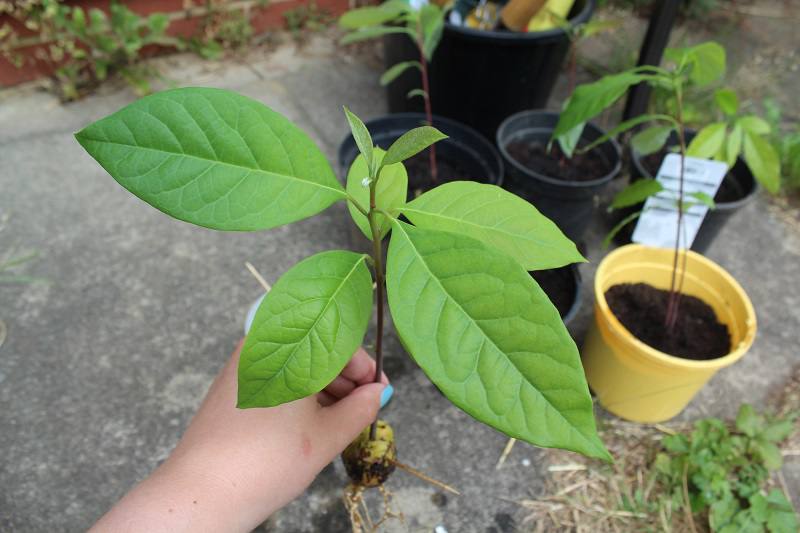
After a couple of months of growing, you should have a split pit with roots and a tree stalk (with leaves, and it’s not uncommon for two stalks to sprout) and firmly outgrown the cup/jar/pot it has been growing in until this point. Now it’s time to plant!
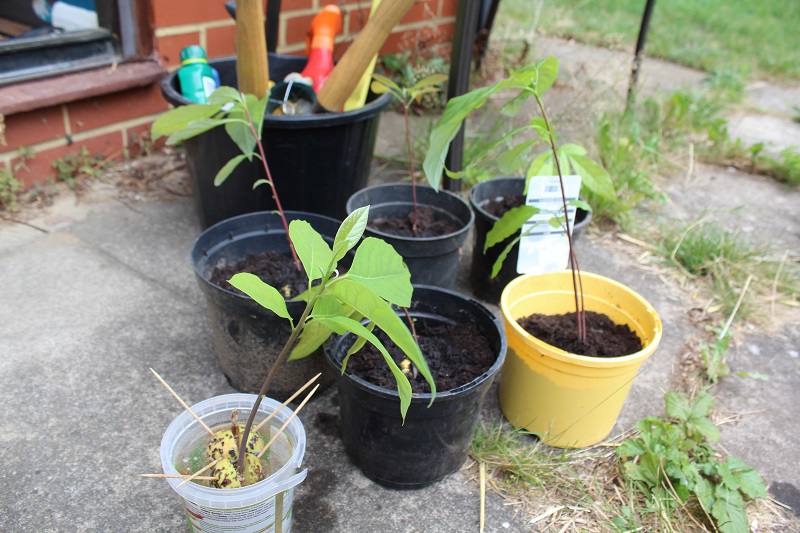
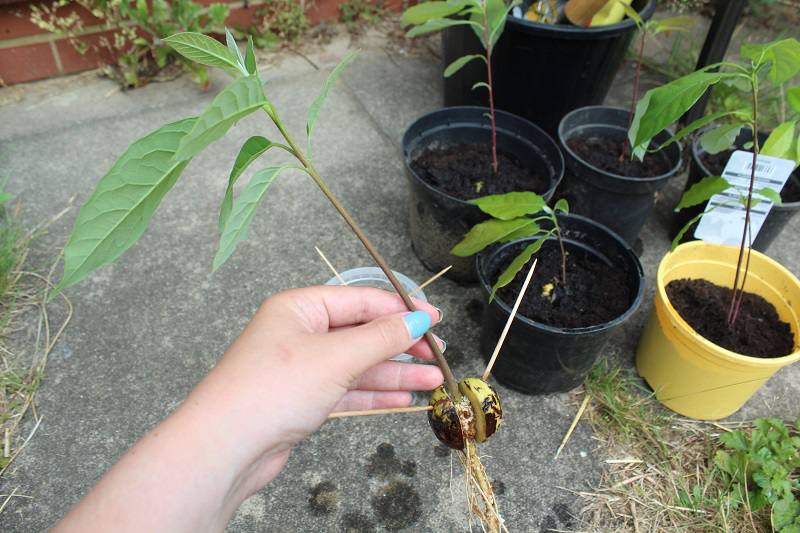
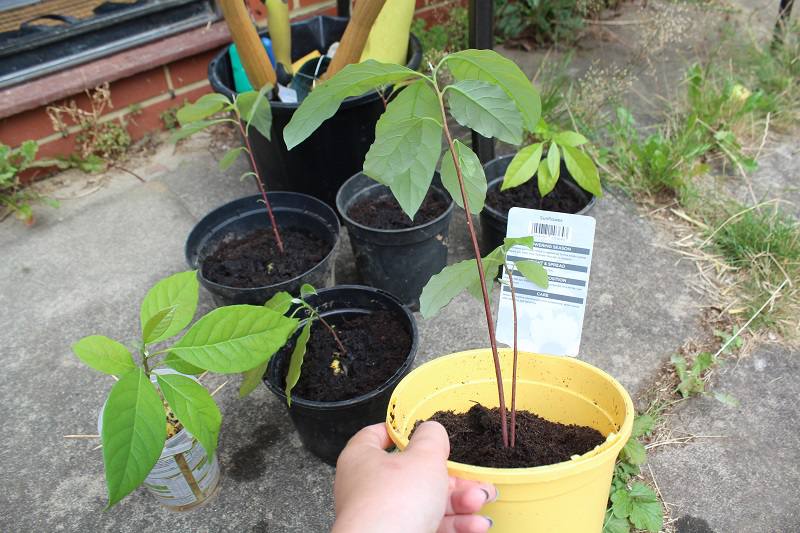
I won’t patronise you and tell you how to plant something in soil (except do of course remove the cocktail sticks), but although they now look strong in health, I would still advise keeping the avocado plants indoors or if they do go outside, they need to be sheltered. Of course it depends on where you live in the world but if you’re in the UK, our weather can quite quickly kill anything not yet sturdy enough to fend for itself. However, a greenhouse or similar should be fine.
How long it takes after that to eventually grow an avocado you can actually eat is anyone’s guess to be honest and I may never get there, but I’m enjoying the process so far. I’ll be sure to let you know if I do succeed!
How do you best enjoy eating avocado? For me I love it mashed up on toast!
Until next time x